The first section of the Astrophysics module for AQA A-level Physics is all about telescopes. This post is a brief summary of that section’s key learning points.
Telescopes aren’t used simply to make astronomical objects “bigger” or to get a “closer” view. It is true that nearby objects, such as our moon and other bodies inside the Solar System, do look bigger and reveal greater detail when viewed through a telescope but that’s not true for distant stars that remain just a dot of light no matter how much magnification the telescope offers.
Astronomical telescopes are designed around three key points;
#1) Thanks to their large aperture, telescopes collect more light than the human eye so they can reveal objects that would otherwise be too dim to see. The most famous example in the early history of astronomy was Galileo’s use of a telescope to see the moons of Jupiter, which helped to disprove the geocentric theory of the Universe.
#2) Also thanks to their large aperture, telescopes can resolve finer details than are visible with the human eye. Early astronomers used this advantage to admire Saturn’s rings but a greater advantage is the ability to reclassify some objects that look like a single star as two stars located very close together.
#3) Whereas the human eye can detect only visible light, telescopes can be designed to detect non-visible forms of “light” (electromagnetic radiation) such as; UV, IR, x-rays and radio waves. In particular, infrared and radio telescopes are especially useful because these signals can penetrate through interstellar dust, allowing objects to be detected that cannot be seen using visible light.
The advantages offered by larger apertures can be calculated so let’s look at some examples.
First, the amount of light collected depends on the area of the aperture. The human eye has a maximum pupil diameter of about 8 mm when fully dilated (1) : this means its area (given by πd2/4) is about 50 mm2. Entry-level home telescopes typically have front-lens diameter of 80 mm, giving an area of 5000 mm2. Therefore, even an inexpensive telescope can reveal objects that are considerably dimmer than the naked eye can see. But not 100x dimmer, as the ratio of areas might suggest.
Star brightness is measured using a logarithmic scale so to determine the advantage offered by the telescope we need count the number of “doublings” between 50 mm2 and 5000 mm2;

An 80 mm telescope can therefore reveal objects that are about 6.5x dimmer than those that can be see with the unaided eye.
Secondly, the resolution (amount of detail visible) depends on the diameter of the aperture. The formula for angular resolution is a combination of the aperture diameter with a term for the wavelength of light that the telescope detects (bearing in mind that the “light” doesn’t have to be visible light).
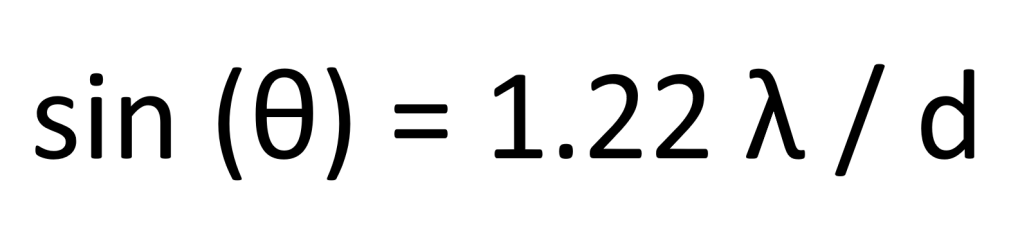
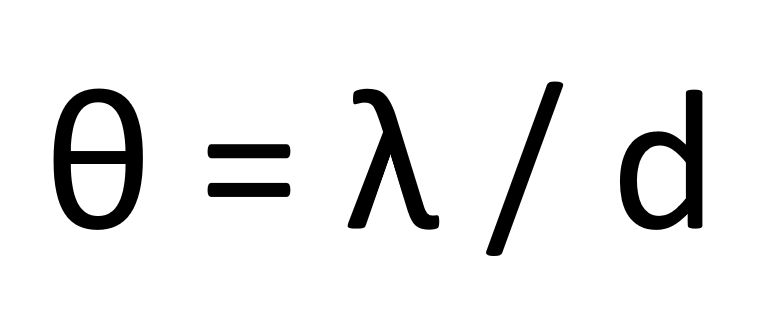
In astronomical observations, provided that we measure the angle in radians (rather than degrees) we can apply the “small angle approximation”, replacing sin (θ) with just θ on its own. In addition, the 1.22 factor is sometimes ignored, giving a simplified version of the equation, as follows;
Returning to our comparison between the human eye and an inexpensive home telescope, we can use the simplified equation to calculate (after converting all measurements to metres) that the eye has a resolution of about 6 x 10⁻⁵ radians versus the telescope’s resolution of 6 x 10⁻⁶ radians. The telescope can therefore resolve details that are about ten times smaller than the naked eye can see.
But in order for the eye to appreciate the fine detail the telescope can resolve, it is necessary to magnify the telescope’s image using an eyepiece lens. The amount of magnification available is given by the focal length of the primary objective (the front lens) divided by the focal length of the eyepiece lens.

In the case of our inexpensive home telescope, the objective focal length is likely to be about 500 mm and a commonly-used eyepiece has a focal length of 20 mm, giving a magnification of 25x. The telescope resolves only ten times more detail than the eye so a 25x magnification is more than enough to reveal all the detail that the telescope can resolve. There would be no point in trying to achieve any higher magnification as finer details would be not become any clearer, they would simply be bigger blurs.
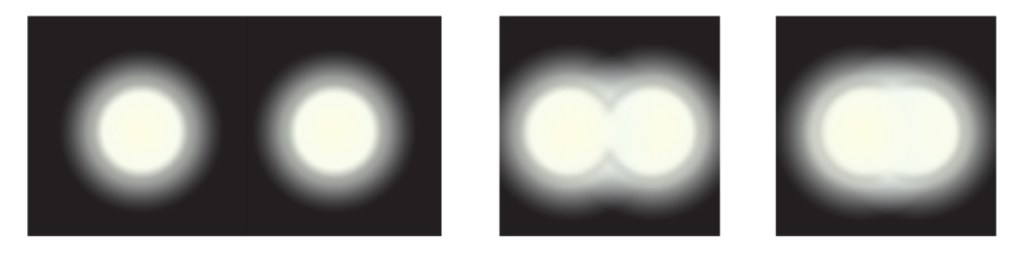
The correct term for the condition that allows two objects to be resolved separately through a telescope is Rayleigh’s criterion (named after Lord Rayleigh, who is also famous for explaining why the sky is blue). Rayleigh’s criterion uses the overlap of the diffraction patterns caused by two light sources to decide whether an observer will see the objects separately or blurred together.
In the A-level Astrophysics course, Rayleigh’s criterion is treated as an application of the simplified resolution equation.
- if the angle between the primary diffraction peaks is greater than λ/d then the two objects will be clearly visible
- if the angular separation is equal to λ/d then the objects will be just resolvable (visible as two separate objects)
- if the angle is less than λ/d then there will be a single bright spot that can only hint at the existence of two separate objects.
13:_Diffraction/13.06:_Circular_Apertures_and_Resolution
Everything so far has referred to telescopes that have a lens at the front. Unfortunately, lenses suffer from various issues that degrade image quality. The two problems covered in the A-level Astrophysics option are spherical aberration and chromatic aberration.
Spherical aberration causes rays of light that travel through the edges of the lens to come to a focus closer than rays of light that go through more central parts of the lens. This creates a blurring effect that can be reduced by masking-off the outer parts of the lens – but doing that would reduce the effective diameter and that in turn would reduce the brightness and the resolution of the image, so it’s not really an option. Instead, lenses can be fabricated with a different (non-spherical) surface profile. This improves image quality but at an additional cost.
The second problem, chromatic aberration, is caused by blue light coming to a focus closer to the lens than red light. As a result, coloured fringes are seen in the image on the boundaries between bright and dark areas. This effect is due to dispersion within the glass and this is the same effect that causes white light to be split into a spectrum when passing through a prism. (If you think about it, the tips of a bi-convex lens look very much like a small prism, so the effect is probably unsurprising.) One solution is to use special extra-low-dispersion glass for the lens, which adds cost, but there is another approach that is much simpler.
Instead of using a glass lens to collect incoming light, it is possible to use a curved (concave) mirror to bring the light to a focus. Mirrors that have a spherical profile will still exhibit spherical aberration but other profiles (such as a parabola) can be used to overcome this problem. Regardless of their profile, mirrors don’t suffer from chromatic aberration because all colours reflect in the same way.
Telescopes that use a mirror to collect light are known as reflecting telescopes whereas those that have a lens are known as refractors.The largest telescopes are all reflectors, not only to address the problems just mentioned but also to reduce weight and cost.
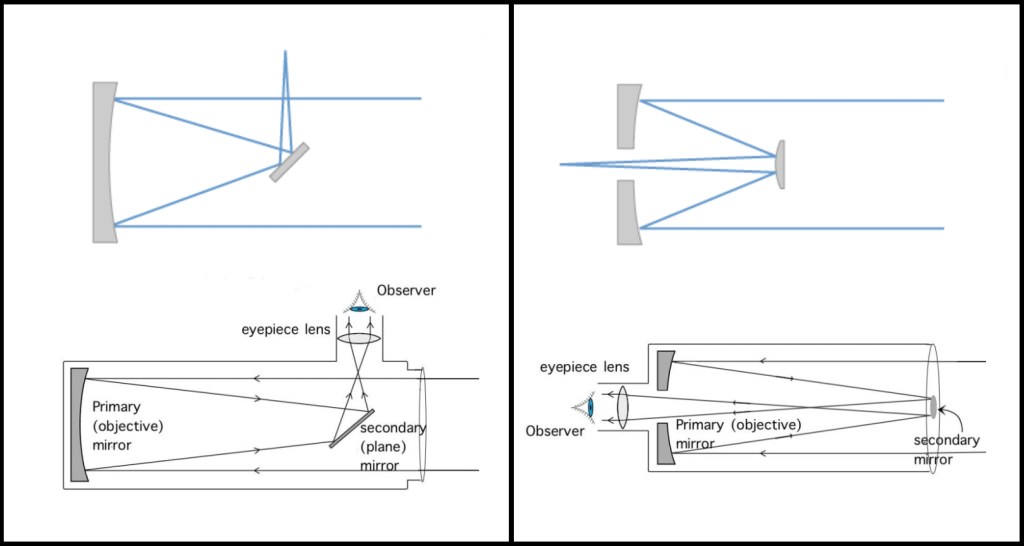
There are various types of reflecting telescopes but the A-level Astrophysics option covers only Newtonian and Cassegrain designs. As mentioned previously, both types have a concave primary (light-collecting) mirror.
- The Newtonian design has a secondary mirror that is flat (plane) and directs light out of the side of the telescope housing.
- The Cassegrain design has a convex secondary mirror that directs light out through a hole in the back of the telescope (and therefore a hole in the primary mirror).
The Cassegrain design has a particular advantage in “folding” the light to make the optical tube much shorter, resulting in a telescope that is easier to carry (for amateur observing) and easier to manoeuvre on a fixed mount (in professional installations).
For a very brief overview of non-optical telescopes and an explanation of atmospheric effects that determine the location of different types of telescopes, ground-based or space-based, see the previous (GCSE-level) article at https://physbang.com/2020/04/23/telescopes-in-space/ .
Finally, before leaving the topic of telescopes, we need to mention the efficiency of the “observer”. The human eye is not very sensitive to light signals (photons) and the first major improvement for observational astronomy was to switch to using photographic emulsions that had been specially sensitised for this purpose. The fact that film can accumulate a signal over an extended period of time greatly improved the quality of astronomical observations. The arrival of digital imaging brought an even bigger improvement in sensitivity.
Astronomical sensitivity is measured using the idea of quantum efficiency. This is based on the number of incident photons needed to produce an observable signal (electron). In the case of the human eye, about 30 photons are needed for a signal to be produced in the eye (2) ; for photographic film the figure can be as low as 10 photons but with digital imaging there is an electron produced for almost every photon that hits the sensor (CCD).
The definition of quantum efficiency is given by the ratio of electrons to photons, as expressed below;

For the human eye, QE has a low single-digit value (typically about 3 – 4 %) whereas for photographic film it peaks at about 10 % and for digital sensors it is in the range 70 – 90 %. This is important because the efficiency of the sensor is a further limitation on the performance of any telescope: to observe the dimmest objects it is necessary to have both a large-diameter telescope and a high efficiency (digital) sensor.
References
(1) See https://www.ncbi.nlm.nih.gov/books/NBK381/ for a really good description of the human eye and its associated medical conditions, taken from Clinical Methods: The History, Physical, and Laboratory Examinations (Chapter 58).
(2) This figure comes from a short and very informative article by Professor William Keel at The University of Alabama, https://pages.astronomy.ua.edu/keel/techniques/eye.html.
